What’s does it take for a quality floor coatings?
Are you a homeowner wanting to refinish a garage, patio, pool deck? Or, maybe you're a business-owner in need of a new look on your commercial space. This five-step installation process will give you the look you need no matter the job. Note: Actuality there is about 23+ steps, we'll just be highlighting the main ones.
Step 1 – Estimate
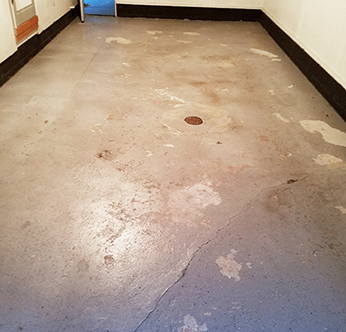
The first step is to meet with you to determine your wants and needs to prepare your estimate. Calculating the square footage of your space is only part or our estimate. We will also check for previous coatings that need to be removed such as old paint, carpet glue, or thin-set from removed tile. Next, we will preform a test to measure the hardness and moisture content. Finally, we'll inspect for cracks and divots that need to be repaired.
Step 2 - Schedule Installation
After preparing your estimate, we will schedule a time to complete your project. When scheduling a time for your floor coating, it's important to allow for the appropriate length of time to complete the job. Most of our floor coating are completed in one to two days. However, occasionally it might take a little longer. After the job is complete, you should allow 5 hours before you can walk on it, and 24 hours before driving on it.
Step 3 - Preparing Your Floor
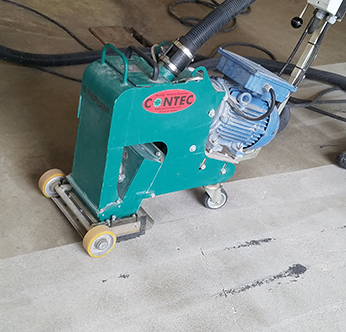
First of all, preparing the floor is the most critical part of the process. Each of our technicians are trained to prepare your concrete floor in order to meet our rigorous standards. Using diamond concrete grinders alone with shot blasters, we prepare the floor by grinding down to a bare concrete surface. Attached to the grinders is a pulse vacuum system. Any dust or debris created by the grinders are immediately sucked into the vacuum, leaving a dustless environment. The grinding/shot blasting process is required to achieve a porous and contaminant-free surface. This allows for the greatest adhesion possible. Even though the grinding machines are large and draw a lot of electricity, you won't need to worry about having enough power. Our generator is brought with us to each job site.
Step 4 - Repairing Cracks and Divots
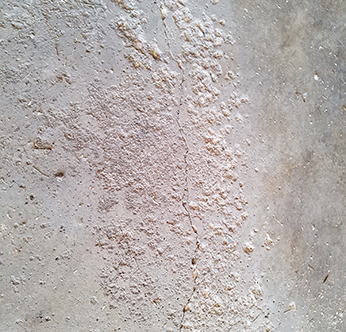
Just about every concrete floor will have some cracks and/or divots. These crack and divots will be cleaned and ground out. Next, they are filled with a fortified polyurea filler that is even harder than the original concrete. Finally, the repairs will be ground smooth.
Step 5 - Installation of Your New Floor Coating
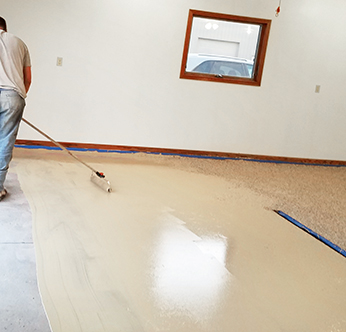
After all of the initial preparation steps are complete, it's time to apply the new floor coating! Now is when it looks like your new floor is starting to take shape. First, we’ll apply a 2-part primer or base coat. Results from the moisture test of your floor from step one will determine the type of primer used on your floor. Next, we apply the decorative coating you chose, whether it is our most popular ¼ inch chips or the decorative quartz. Lastly, the UV top coats are added for lifelong protection of your new floor. You should wait 4-5 hours after the project is finished before walking on the floor. After 24 hours, you can park your car on your brand-new floor.